A Functional Canvas Approach With Redux: Part 2
Using the three fundamental principles of Redux #
Translating With The Low Level Canvas API #
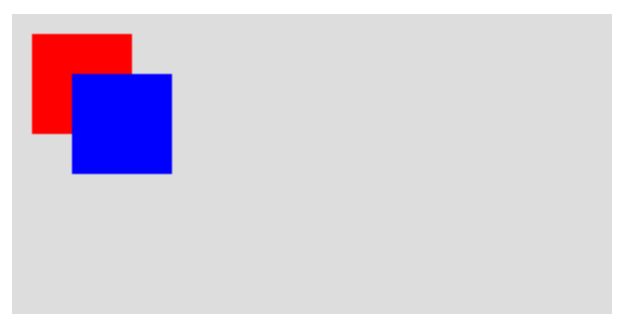
In part 1, we examined a low level, object oriented, and functional approach to drawing using HTML Canvas. Now let’s add some more interactivity to our drawing by responding to mouse events. To start with something basic, let’s translate the whole canvas by 5px each time the user clicks down on the mouse. Let’s see what this looks like using the low level Canvas API (live demo here):
var canvas = document.querySelector("canvas");
var ctx = canvas.getContext("2d");
ctx.fillStyle = "red";
ctx.fillRect(10, 10, 50, 50);
ctx.fillStyle = "blue";
ctx.fillRect(30, 30, 50, 50);

var canvasX = 0;
canvas.addEventListener('mousedown', function(event) {
  canvasX += 5;
  ctx.setTransform(1, 0, 0, 1, 0, 0);
  ctx.clearRect(0, 0, canvas.width, canvas.height);
  ctx.setTransform(1, 0, 0, 1, canvasX, 0);
  ctx.fillStyle = "red";
  ctx.fillRect(10, 10, 50, 50);
  ctx.fillStyle = "blue";
  ctx.fillRect(30, 30, 50, 50);
}, false);
In this example, we first draw a red and blue rectangle. Then we’re using the canvasX variable to keep track of the horizontal position of the canvas, and we’re adding an event listener to run some code any time the user clicks on the canvas. Each time the mouse is clicked, we add 5 to the canvasX variable.
There is no actual way to translate the objects on the canvas, since they aren’t objects, but simply pixels on the screen. To create the translate effect, we have to erase the canvas, then translate the canvas before drawing the items:
ctx.setTransform(1, 0, 0, 1, 0, 0);
ctx.clearRect(0, 0, canvas.width, canvas.height);
ctx.setTransform(1, 0, 0, 1, canvasX, 0);
The setTransform function defines a mathematical matrix transformation with 6 arguments — scale x, skew x, skew y, scale y, translate x, and translate y. This may sound confusing, but it simply means you can control the scale, skew, and translation of the canvas using this function. The first line resets the canvas to the default (an x and y scale of 1, a skew of 0, and a translation to 0, 0). The second line clears the canvas. The third line moves the canvas over to the x position defined by canvasX. Any subsequent drawing commands will now be translated accordingly!
Note that the example code is not DRY, since we’re duplicating the drawing code each time we’re updating the canvas. Let’s move the drawing code into its own method called draw. Let’s also implement a more fully featured draggable canvas, where the canvas drags with the mouse while holding it down (live demo here):
var canvas = document.querySelector("canvas");
var ctx = canvas.getContext("2d");
var canvasX = 0, canvasY = 0;
var xDragging = null, yDragging = null;

var draw = function() {
  ctx.setTransform(1, 0, 0, 1, 0, 0);
  ctx.clearRect(0, 0, canvas.width, canvas.height);
  ctx.setTransform(1, 0, 0, 1, canvasX, canvasY);
  ctx.fillStyle = "red";
  ctx.fillRect(10, 10, 50, 50);
  ctx.fillStyle = "blue";
  ctx.fillRect(30, 30, 50, 50);
};

canvas.addEventListener('mousedown', function(event) {
  xDragging = event.offsetX;
  yDragging = event.offsetY;
}, false);

canvas.addEventListener('mousemove', function(event) {
  if (xDragging !== null && yDragging !== null) {
    canvasX += event.offsetX - xDragging;
    canvasY += event.offsetY - yDragging;
    draw();
    xDragging = event.offsetX;
    yDragging = event.offsetY;
  }
}, false);

canvas.addEventListener('mouseup', function(event) {
  xDragging = null;
  yDragging = null;
}, false);

draw();
The result looks like:
Here we’re using three event listeners. On mousedown, we store the user’s mouse position. On mousemove, we update the canvasX and canvasY variables based on the change in mouse position, redraw the canvas based on those updated values, and update the stored mouse position. On mouseup, we clear the stored mouse position (so we can determine whether or not the mouse is down).
At this point, the code isn’t too bad, but it’s easy to see that it can get out of hand — we are introducing more stray variables that can be mutated anywhere in the code. As we mentioned in the introduction, one way to organize the application state is to use an object oriented approach, which is what many Canvas libraries do. In our case, we’re going to look at a functional approach using Redux.
Translating With A Functional Redux Approach #
Instead of using object oriented principles, we can instead use functional principles with the Redux library. Instead of separating state into multiple instances of objects, we can keep the state in a single state object. We then can use pure functions to modify the state object. The Redux documentation refers to this design as the three fundamental principles of Redux, which we will implement in our canvas example one step at a time.
The first principle is Single source of truth, which in our case we can accomplish by defining all our application state in a single object. This is a pure data representation of what we will render to the screen. The goal here is to completely decouple this state data from the rest of the code.
var initialState = {
  canvas: { x: 0, y: 0 },
  items: [
    { x: 10, y: 10, width: 50, height: 50, color: "red" },
    { x: 30, y: 30, width: 50, height: 50, color: "blue" },
  ],
  xDragging: null,
  yDragging: null,
};
The second principle is State is read-only, which we can accomplish by dispatching actions in the canvas mousedown, mousemove, and mouseup events. Any time the state needs to change, instead of mutating it directly, we send an action describing what happened. The action is simply a plain data object with a type to identify the action and any other data pertinent to that action. (Note we haven't defined the store variable yet - it's the part of Redux that enables you to dispatch actions, which we will define momentarily).
canvas.addEventListener('mousedown', function(event) {
  store.dispatch({
    type: 'TRANSLATE_CANVAS_START',
    xDragging: event.offsetX,
    yDragging: event.offsetY
  });
}, false);

canvas.addEventListener('mousemove', function(event) {
  var state = store.getState();
  if (state.xDragging !== null && state.yDragging !== null) {
    store.dispatch({
      type: 'TRANSLATE_CANVAS',
      xDragging: event.offsetX,
      yDragging: event.offsetY
    });
  }
}, false);

canvas.addEventListener('mouseup', function(event) {
  store.dispatch({
    type: 'TRANSLATE_CANVAS_END'
  });
}, false);
The third principle is Changes are made with pure functions, which you can see in the reducer function. The reducer function gets called each time an action is dispatched. It is considered a “pure” function because it does not mutate any variables — instead of making changes directly to the given state, it returns a new copy of the state with appropriate modifications. The reducer function takes in the current state object and the action object, and outputs a new state object based on the action. Note that it returns the initialState defined earlier if no state is provided, which happens when it is first called up.
var reducer = function (state, action) {
  if (typeof state === "undefined") {
    return initialState;
  }
  switch (action.type) {
    case "TRANSLATE_CANVAS_START":
      return {
        canvas: state.canvas,
        items: state.items,
        xDragging: action.xDragging,
        yDragging: action.yDragging,
      };
    case "TRANSLATE_CANVAS":
      return {
        canvas: {
          x: state.canvas.x + action.xDragging - state.xDragging,
          y: state.canvas.y + action.yDragging - state.yDragging,
        },
        items: state.items,
        xDragging: action.xDragging,
        yDragging: action.yDragging,
      };
    case "TRANSLATE_CANVAS_END":
      return {
        canvas: state.canvas,
        items: state.items,
        xDragging: null,
        yDragging: null,
      };
    default:
      return state;
  }
};
All that’s left is to wire everything up together, which is done with the code below. The createStore function creates the Redux store using the reducer function we defined. The subscribe function tells Redux to call up the given draw function each time the store changes due to some action.
var store = Redux.createStore(reducer);
store.subscribe(draw);
The draw function is similar to the one we had before. The draw function gets the current Redux state and renders the desired output to the screen. Note that this is the only part of our code which refers to the ctx canvas rendering context. The rendering code has been completely isolated into this draw function. Every other line of code is only responsible for managing the state data and how it transforms. This separation of concerns is the key to making the code easier to maintain.
var canvas = document.querySelector("canvas");
var ctx = canvas.getContext("2d");

var draw = function () {
  var state = store.getState();
  ctx.setTransform(1, 0, 0, 1, 0, 0);
  ctx.clearRect(0, 0, canvas.width, canvas.height);
  ctx.setTransform(1, 0, 0, 1, state.canvas.x, state.canvas.y);
  state.items.forEach(function (item) {
    ctx.fillStyle = item.color;
    ctx.fillRect(item.x, item.y, item.width, item.height);
  });
};
You can check out the complete Redux implementation with a live demo here.
Let’s walk through an example of how Redux responds to an action. Say the app first starts up, so the state is equal to the initialState variable. If the user clicks on the canvas at the position (10, 30), the following code gets triggered:
canvas.addEventListener('mousedown', function(event) {
  store.dispatch({
    type: 'TRANSLATE_CANVAS_START',
    xDragging: event.offsetX,
    yDragging: event.offsetY
  });
}, false);
The store.dispatch function triggers the reducer function to be called up with the following arguments:
var reducer = function (state, action) {
  // state => initialState
  // action => { type: 'TRANSLATE_CANVAS_START', xDragging: 10, yDragging: 30 }
};
Walking through the reducer function code, you’ll hit the 'TRANSLATE_CANVAS_START' case and return the following state:
return {
  canvas: state.canvas,
  items: state.items,
  xDragging: action.xDragging,
  yDragging: action.yDragging,
};
This is a copy of the original state with updated xDragging and yDragging values using the values given by the action object. Once the reducer returns this state, the Redux state is updated, which in turn triggers the draw function and updates the view. As the user drags the mouse, additional actions will be dispatched, triggering the reducer and draw functions accordingly.
Adding Features With Redux #
Redux may be more difficult to wire together and understand initially, but this clear separation of data and rendering code makes it easier to add new features over time. Note that the code no longer has stray variables that can be mutated anywhere — all the relevant data is stored in the Redux state, and the only way it can be changed is by dispatching a Redux action. Let’s add another feature to our Redux example — translating individual items. The final result will look like:
Let’s take a look at the changes needed to make this feature work. First, the shape of the state changed to include ids for each item, which we use to keep track of which item is being dragged with draggingItemId. Initially no item is being dragged, so draggingItemId is set to null.
var initialState = {
  canvas: { x: 0, y: 0 },
  items: [
    { id: 1, x: 10, y: 10, width: 50, height: 50, color: "red" },
    { id: 2, x: 30, y: 30, width: 50, height: 50, color: "blue" },
  ],
  xDragging: null,
  yDragging: null,
  draggingItemId: null,
};
Now in our reducer function, we have 3 new actions — TRANSLATE_ITEM_START, TRANSLATE_ITEM, and TRANSLATE_ITEM_END. For TRANSLATE_ITEM_START, we are returning a copy of the state with the updated mouse position as well as which item was selected. Note that the reducer isn’t responsible for determining which item was selected — that code is defined elsewhere. The reducer is only responsible for creating a copy of the state with updated values.
    case 'TRANSLATE_ITEM_START':
      return {
        canvas: state.canvas,
        items: state.items,
        xDragging: action.xDragging,
        yDragging: action.yDragging,
        draggingItemId: action.id
      };
For TRANSLATE_ITEM, we are updating the x and y values of the item currently being dragged. Note that we’re taking great care not to mutate the state, but rather to return a brand new copy of every part of the state. There are ways to simplify this code, but for now we’ll leave it as explicit as possible. To update the item’s x and y values without mutation, we create a new copy of the items called newItems using JavaScript’s map array function. Once we create the newItems, we return the copy of the state, which has updated items, xDragging, and yDragging values.
    case 'TRANSLATE_ITEM':
      var newItems = state.items.map(function(item) {
        if (item.id === state.draggingItemId) {
          return {
            id: item.id,
            x: item.x + action.xDragging - state.xDragging,
            y: item.y + action.yDragging - state.yDragging,
            width: item.width,
            height: item.height,
            color: item.color
          };
        } else {
          return item;
        }
      });
For TRANSLATE_ITEM_END, we are returning a copy of the state with the mouse position and the selected item id set to null.
    case 'TRANSLATE_ITEM_END':
      return {
        canvas: state.canvas,
        items: state.items,
        xDragging: null,
        yDragging: null,
        draggingItemId: null
      };
Finally, we have our modified event listener code which determines whether the canvas or an individual item is being dragged. On mousedown, we loop through the items in reverse order to see if an item is clicked on. To do this we can use the isPointInPath function that is part of the Canvas context. This function works by first drawing a virtual path (with the beginPath and rect functions). Once a path is drawn, the isPointInPath function can be called with an x and y coordinate, and will return true if the point is in the path. If it is, we dispatch a TRANSLATE_ITEM_START action. If not, we dispatch a TRANSLATE_CANVAS_START action.
canvas.addEventListener('mousedown', function(event) {
  var state = store.getState();
  for (var i = state.items.length - 1; i >= 0; i--) {
    var item = state.items[i];
    ctx.beginPath();
    ctx.rect(item.x, item.y, item.width, item.height);
    if (ctx.isPointInPath(event.offsetX, event.offsetY)) {
      store.dispatch({
        type: 'TRANSLATE_ITEM_START',
        id: item.id,
        xDragging: event.offsetX,
        yDragging: event.offsetY
      });
      return;
    }
  }
  store.dispatch({
    type: 'TRANSLATE_CANVAS_START',
    xDragging: event.offsetX,
    yDragging: event.offsetY
  });
}, false);
On mousemove, we can examine the state to see if an item is currently being dragged (using the draggingItemId value) or if the canvas is currently being dragged (using the xDragging and yDragging values). If something is being dragged, we dispatch the TRANSLATE_ITEM or TRANSLATE_CANVAS action accordingly.
canvas.addEventListener('mousemove', function(event) {
  var state = store.getState();
  if (state.draggingItemId !== null) {
    store.dispatch({
      type: 'TRANSLATE_ITEM',
      xDragging: event.offsetX,
      yDragging: event.offsetY
    });
  } else if (state.xDragging !== null && state.yDragging !== null) {
    store.dispatch({
      type: 'TRANSLATE_CANVAS',
      xDragging: event.offsetX,
      yDragging: event.offsetY
    });
  }
}, false);
On mouseup, we dispatch a TRANSLATE_ITEM_END or TRANSLATE_CANVAS_END action depending on which was being dragged. Note that these could be combined into a single TRANSLATE_END action since they’re so similar, but we’ll keep them separate for the sake of clarity for now.
canvas.addEventListener('mouseup', function(event) {
  var state = store.getState();
  if (state.draggingItemId !== null) {
    store.dispatch({
      type: 'TRANSLATE_ITEM_END'
    });
  } else {
    store.dispatch({
      type: 'TRANSLATE_CANVAS_END'
    });
  }
}, false);
You can check out the complete live demo here.
Although adding new features with Redux may seem awkward at first, it is very worthwhile because forces you to maintain a separation of concerns. Once you get used to it, it becomes easy to add new features — since everything has an appropriate place, there’s fewer decisions that need to be made from a code design perspective. Although JavaScript is not a purely functional language, we can use functional approaches with Redux to avoiding mutation, which makes the code easier to maintain.