Comparing Frontend Approaches Part 4: Vue.js with Components
- Part 1: Introduction
- Part 2: jQuery
- Part 3: Vue.js
- Part 4: Vue.js with components
- Part 5: React
- Part 6: Elm
- Part 7: Final thoughts
In this part we will be implementing the web based clone of the Mac Notes app using Vue.js, but this time with components. As mentioned last time, Vue.js labels itself as “the progressive JavaScript framework”, which means you learn and implement the advanced functionality only as needed. One such feature is using components, which are a great way to organize code once an app becomes sufficiently complex.
Using components to isolate behavior and increase reusability isn’t a new programming concept, but it is new for frontend programming. Native web components for the browser were first announced in 2011 but never fully landed (as of 2017). JavaScript frameworks picked up the slack, providing an immediate way to build complex apps with a component architecture. However, there are significant tradeoffs to using components — setup, build tools, passing data all becomes harder compared to prior approaches. Let’s see what it looks like in practice to evaluate the tradeoffs ourselves!
Note — the focus of this part is largely on the Vue.js component model itself. If you want a broader look at Vue.js features such as basic directives and options, I would recommend starting with the previous part of this series where I build the same app using Vue.js without components.
Installation #
The installation process for Vue.js with components is pretty different than installing jQuery and Vue.js without components. This is because using components naturally lends itself to writing code in separate files, which means we’ll need a build process to bundle our JavaScript. This would normally be a lot of work, but fortunately Vue.js offers vue-cli, a command line tool to scaffold out projects. If you don’t already have it installed, you can install vue-cli with the command:
$ npm install -g @vue/cli
Once you have it installed, you can navigate to the directory you want to create your project in and run:
$ vue create my-project
You should replace my-project with whatever name you want your particular project to have. This will prompt you with setup options (you can choose the default setup). In the end you will end up a new folder called my-project with the following project structure:
.├── node_modules/
 │   └── ...
 ├── public/
 │   ├── favicon.ico
 │   └── index.html
 ├── src/
 │   ├── assets/
 │   │   └── logo.png
 │   ├── components/
 │   │   └── HelloWorld.vue
 │   ├── App.vue
 │   └── main.js
 ├── .gitignore
 ├── babel.config.js
 ├── package-lock.json
 ├── package.json
 └── README.md
Whew, that’s a lot of files! Fortunately you don’t need to worry about most of them for right now (you can read more about the project structure from the official guide), pretty much all of our work will be in the src directory. At this point you already have a hello world app built for you, which you can see by entering the following commands:
$ cd my-project$ npm run serve
The last command will run a dev server and automatically open up your browser to localhost:8080, where you should see something like this:
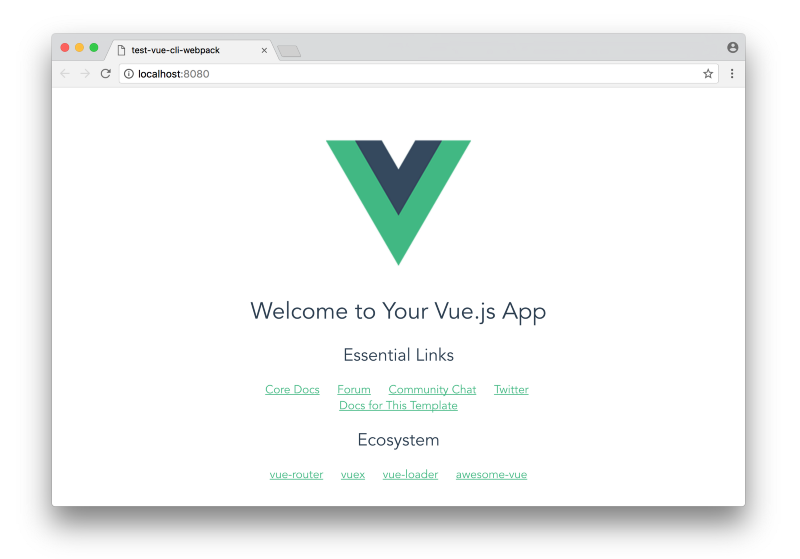
This is pretty cool, and what’s cooler is that you have a hot-reloading environment already set up for you. What that means is that if you make changes to your code, the browser at localhost:8080 will automatically refresh. The place to start making changes is src/App.vue, which right now looks like this:
<template>
  <div id="app">
    <img alt="Vue logo" src="./assets/logo.png">
    <HelloWorld msg="Welcome to Your Vue.js App"/>
  </div>
</template>

<script>
import HelloWorld from './components/HelloWorld.vue'

export default {
  name: 'app',
  components: {
    HelloWorld
  }
}
</script>

<style>
#app {
  font-family: 'Avenir', Helvetica, Arial, sans-serif;
  -webkit-font-smoothing: antialiased;
  -moz-osx-font-smoothing: grayscale;
  text-align: center;
  color: #2c3e50;
  margin-top: 60px;
}
</style>
This is a Vue.js component — a single .vue file which contains the HTML template in a <template> tag, the JavaScript in a <script> tag, and the CSS in a <style> tag. Which means we can take the HTML and CSS from our notes app template and use it instead, which would make the src/App.vue look like this:
<template>
  <div id="app">
    <div class="toolbar">
      <button class="toolbar-button">New</button>
      <button class="toolbar-button">Delete</button>
      <input class="toolbar-search" type="text" placeholder="Search...">
    </div>
    <div class="note-container">
      <div class="note-selectors">
        <div class="note-selector active">
          <p class="note-selector-title">First note...</p>
          <p class="note-selector-timestamp">Timestamp here...</p>
        </div>
        <div class="note-selector">
          <p class="note-selector-title">Second note...</p>
          <p class="note-selector-timestamp">Timestamp here...</p>
        </div>
        <div class="note-selector">
          <p class="note-selector-title">Third note...</p>
          <p class="note-selector-timestamp">Timestamp here...</p>
        </div>
      </div>
      <div class="note-editor">
        <p class="note-editor-info">Timestamp here...</p>
        <textarea class="note-editor-input">
          First note...

          Note text here...
        </textarea>
      </div>
    </div>
  </div>
</template>

<script>
export default {
  name: 'app'
};
</script>

<style>
/* RESET */
* {
  margin: 0;
  padding: 0;
  border: 0;
  outline: none;
  box-sizing: border-box;
}

/* LAYOUT */
#app {
  display: flex;
  flex-direction: column;
  min-height: 100vh;
}
.toolbar {
  padding: 0.5em;
}
.toolbar-button, .toolbar-search {
  padding: inherit;
  border-radius: 0.3em;
}
.toolbar-search {
  float: right;
}
.note-container {
  display: flex;
  flex: 1;
}
.note-selectors {
  flex: 0 0 13em;
}
.note-selector {
  padding: 1em;
}
.note-selector p {
  margin: 0;
}
.note-editor {
  display: flex;
  flex: 1;
  flex-direction: column;
}
.note-editor-info {
  padding: 0.5em;
  text-align: center;
}
.note-editor-input {
  display: flex;
  flex: 1;
  width: 100%;
  padding: 0 2em 0 2em;
}

/* COLORS */
* {
  color: #454545;
  background-color: #FAFAF8;
}
.toolbar {
  background-color: #DCDADC;
}
.toolbar-button {
  background-color: #FFFFFF;
}
.toolbar-button:active {
  background-color: #AAAAAA;
}
.note-selectors {
  border-right: 1px solid #DCDADC;
}
.note-selector {
  border-bottom: 1px solid #DCDADC;
}
.note-selector.active {
  background-color: #FCE18D;
}
.note-selector-title {
  background-color: inherit;
}
.note-selector-timestamp {
  color: #626262;
  background-color: inherit;
}
.note-editor-info {
  color: #DCDADC;
}

/* TYPOGRAPHY */
body {
  font-family: sans-serif;
}
.note-selector-title {
  font-weight: bold;
}
.note-selector-timestamp {
  font-size: 0.7em;
}
.note-editor, .note-editor-input {
  font-size: 0.9em;
}
</style>
If you look at your browser, you should see our familiar notes app starting point!
Refactor into components #
The next step is to break this src/App.vue file into components. Here is a diagram of the different components we can break this app into:
<app>
├── <Toolbar>
└── <NoteContainer>
    ├── <NoteSelectors>
    │   └── <NoteSelector>
    │   └── <NoteSelector>
    │   └── <NoteSelector>
    └── <NoteEditor>
You could of course break it down even further (with individual button components for the toolbar for example), but this is a good starting point. Using this structure, the src/App.vue file would now look like:
<template>
  <div id="app">
    <Toolbar/>
    <NoteContainer/>
  </div>
</template>

<script>
import Toolbar from './components/Toolbar';
import NoteContainer from './components/NoteContainer';

export default {
  name: 'app',
  components: {
    Toolbar,
    NoteContainer
  }
};
</script>

<style>
/* RESET */
* {
  margin: 0;
  padding: 0;
  border: 0;
  outline: none;
  box-sizing: border-box;
}

/* LAYOUT */
#app {
  display: flex;
  flex-direction: column;
  min-height: 100vh;
}

/* COLORS */
* {
  color: #454545;
  background-color: #FAFAF8;
}

/* TYPOGRAPHY */
body {
  font-family: sans-serif;
}
</style>
The template essentially only contains the <Toolbar/> and <NoteContainer/> custom component tags, which are defined in the JavaScript. In the script tag, we import the components and register them with the Vue.js app. Finally, the style tag has changed only to include the CSS at the top level — any component specific styles will be defined within the components themselves. Let’s take a look at one of the sub-components, src/components/Toolbar.vue:
<template>
  <div class="toolbar">
    <button class="toolbar-button">New</button>
    <button class="toolbar-button">Delete</button>
    <input class="toolbar-search" type="text" placeholder="Search...">
  </div>
</template>

<script>
export default {
  name: 'toolbar'
};
</script>

<style>
/* LAYOUT */
.toolbar {
  padding: 0.5em;
}
.toolbar-button, .toolbar-search {
  padding: inherit;
  border-radius: 0.3em;
}
.toolbar-search {
  float: right;
}

/* COLORS */
.toolbar {
  background-color: #DCDADC;
}
.toolbar-button {
  background-color: #FFFFFF;
}
.toolbar-button:active {
  background-color: #AAAAAA;
}
</style>
As you can see, it’s the same as before — the template contains the HTML for just the toolbar, the script contains the JavaScript (which isn’t doing much right now), and the style contains the CSS for just the toolbar.
So breaking things into components is a pretty straightforward task. The harder part comes when dealing with data and events. If you want to see what the rest of the components look like right now (they pretty much follow the same pattern), you can check them out in full detail here.
Display note titles from an array of notes #
Now that things are broken into components, we have to make some choices when it comes to storing and passing data. For the array of notes, it makes sense for the main <App> component to keep track of the notes and pass it down to its children. This would make src/App.vue template and script look like:
<template>
  <div id="app">
    <Toolbar/>
    <NoteContainer v-bind:notes="notes"/>
  </div>
</template>

<script>
import Toolbar from './components/Toolbar';
import NoteContainer from './components/NoteContainer';

export default {
  name: 'app',
  data: function() {
    return {
    notes: [
        {id: 1, body: "This is a first test", timestamp: Date.now()},
        {id: 2, body: "This is a second test", timestamp: Date.now()},
        {id: 3, body: "This is a third test", timestamp: Date.now()}
      ]
    };
  },
  components: {
    Toolbar,
    NoteContainer
  }
};
</script>
(Note — I’m not showing any <style> tags anymore because they won’t change from here on out). In the <script> tag, we define the notes array in the data option as we did in the previous Vue.js app. In the <template> tag, we pass the notes data to the <NoteContainer> component with the line:
<NoteContainer v-bind:notes="notes"/>Here we’re binding a custom notes attribute to the component, which contains the array of notes defined in the data option. However, the <NoteContainer> component doesn’t directly display the notes, so it has to pass it down using a similar technique. Here’s what the src/components/NoteContainer.vue template and script look like:
<template>
  <div class="note-container">
    <NoteSelectors v-bind:notes="notes"/>
    <NoteEditor/>
  </div>
</template>

<script>
import NoteSelectors from './NoteSelectors';
import NoteEditor from './NoteEditor';

export default {
  name: 'note-container',
  props: ['notes'],
  components: {
    NoteSelectors,
    NoteEditor
  }
};
</script>
In the <script> tag, we’re defining the notes as an element in the array of props. This is an important distinction — the <NoteContainer> component doesn’t have notes defined in the data option, because it doesn’t define its own notes; rather, it’s getting the notes data from its parent. Data received from a parent is stored in the props option.
Again, the <NoteContainer> component doesn’t deal with the notes directly, so it has to pass it down to the <NoteSelectors> component, which you see in the template line:
<NoteSelectors v-bind:notes="notes"/>Finally, we get to <NoteSelectors> component, which does actually use the notes. This is what the src/components/NoteSelectors.vue template and script look like:
<template>
  <div class="note-selectors">
      <NoteSelector
        v-for="note in notes"
        v-bind:note="note"
        v-bind:key="note.id"
      />
  </div>
</template>

<script>
import NoteSelector from './NoteSelector';

export default {
  name: 'note-selectors',
  props: ['notes'],
  components: {
    NoteSelector
  }
};
</script>
Now we can use the notes and loop over them with a v-for directive to create as many <NoteSelector> components as we need. We need to bind each note object to the component, as well as a unique key to help Vue.js keep track of each component. This is what the src/components/NoteSelector.vue template and script look like:
<template>
  <div class="note-selector">
    <p class="note-selector-title">{{ note.body }}</p>
    <p class="note-selector-timestamp">{{ note.timestamp }}</p>
  </div>
</template>

<script>
export default {
  name: 'note-selector',
  props: ['note']
};
</script>
In the <script> tag we register the note as a prop (the key is used internally by Vue.js), and the <template> tag looks like a straightforward Vue.js template. For now, I’m using the note’s body and raw timestamp as placeholders, we’ll look at formatting them in the next section.
Whew, that was a lot of work just to loop through an array of notes! There definitely is a price to pay for breaking things into components — maintaining strong boundaries means you must put in more effort to pass information across said boundaries. However, although the concept of passing down data as props from component to component seems foreign at first, it gets to be second nature, since the patterns are fairly straightforward and repeatable.
Use computed properties and filters to sort and format notes #
Right now the <NoteSelector> component needs formatting for the title and timestamp, which we can accomplish with Vue.js filters. This is what the src/components/NoteSelector.vue template and script look like with filters:
<template>
  <div class="note-selector">
    <p class="note-selector-title">
      {{ note.body | formatTitle }}
    </p>
    <p class="note-selector-timestamp">
      {{ note.timestamp | formatTimestamp }}
    </p>
  </div>
</template>

<script>
export default {
  name: 'note-selector',
  filters: {
    formatTitle: function(body) {
      var maxLength = 20;
      if (body.length > maxLength) {
        return body.substring(0, maxLength - 3) + '...';
      } else if (body.length === 0) {
        return "New note";
      } else {
        return body;
      }
    },
    formatTimestamp: function(timestamp) {
      return new Date(timestamp).toUTCString();
    }
  },
  props: ['note']
};
</script>
Also, the parent <NoteSelectors> component needs to sort the child <NoteSelector> components by timestamps. This is what the src/components/NoteSelectors.vue template and script look like:
<template>
  <div class="note-selectors">
      <NoteSelector
        v-for="note in transformedNotes"
        v-bind:note="note"
        v-bind:key="note.id"
      />
  </div>
</template>

<script>
import NoteSelector from './NoteSelector';

export default {
  name: 'note-selectors',
  props: ['notes'],
  computed: {
    transformedNotes: function() {
      return this.notes.slice().sort(function(a, b) {
        return b.timestamp - a.timestamp;
      });
    }
  },
  components: {
    NoteSelector
  }
};
</script>
This is pretty straightforward, and it begins to showcase the nice advantage of working with components — you can determine which component is responsible for which behavior and organize your code accordingly. Right now we have the <NoteSelector> component responsible for title and timestamp formatting, and the <NoteSelectors> parent component responsible for sorting. If there’s ever an issue, it makes it easier to locate and work on the appropriate code.
Select a note on title click #
Now let’s implement the ability to actually select notes. Clicking on a note title should both highlight the selected note on the left as well as display the contents in the editor on the right. First we’ll change the template in src/App.vue as follows:
<template>
  <div id="app">
    <Toolbar/>
      <NoteContainer
        v-bind:notes="notes"
        v-bind:selectedNote="selectedNote"
        v-on:selectNote="selectNote"
      />
  </div>
</template>
Here we’re sending a new prop and event to the <NoteContainer> component. The names can be confusing, so it’s worth going over in detail.
- The code
v-bind:selectedNoteis essentially creating a new prop calledselectedNotewhich will be available in<NoteContainer>. It is being set equal to"selectedNote", which is referring to a variable that must be defined in the current<App>component’sdataoption. - The code
v-on:selectNoteis creating an event listener on the<NoteContainer>component. If the<NoteContainer>component ever emits an event with the nameselectNote, it will run whatever code it is being set equal to, which in this case is"selectNote", a method that must be defined in the current<App>component’s methods option.
This means the script in src/App.vue should define selectedNote in the data and selectNote in the methods, as follows:
<script>
import Toolbar from './components/Toolbar';
import NoteContainer from './components/NoteContainer';

export default {
  name: 'app',
  data: function() {
    var initialNotes = [
      {id: 1, body: "This is a first test", timestamp: Date.now()},
      {id: 2, body: "This is a second test", timestamp: Date.now()},
      {id: 3, body: "This is a third test", timestamp: Date.now()}
    ];
    return {
      notes: initialNotes,
      selectedNote: initialNotes[0]
    };
  },
  methods: {
    selectNote: function(note) {
      this.selectedNote = note;
    }
  },
  components: {
    Toolbar,
    NoteContainer
  }
};
</script>
So far so good. Now we have to make sure the child <NoteContainer> component will emit a selectNote event any time a note selector is clicked. This is what the src/components/NoteContainer.vue template and script look like:
<template>
  <div class="note-container">
      <NoteSelectors
        v-bind:notes="notes"
        v-bind:selectedNote="selectedNote"
        v-on:selectNote="selectNote"
      />
      <NoteEditor
        v-bind:selectedNote="selectedNote"
      />
  </div>
</template>

<script>
import NoteSelectors from './NoteSelectors';
import NoteEditor from './NoteEditor';

export default {
  name: 'note-container',
  props: ['notes', 'selectedNote'],
  methods: {
    selectNote: function(note) {
      this.$emit('selectNote', note);
    }
  },
  components: {
    NoteSelectors,
    NoteEditor
  }
};
</script>
Similar to the <App> component, the <NoteContainer> component has to pass the selectedNote prop and the selectNote event to the child <NoteSelector> component. Note that if the <NoteSelector> component emits a selectNote event, it will run this function:
methods: {
  selectNote: function(note) {
    this.$emit('selectNote', note);
  }
},
This function emits a selectNote event from the <NoteContainer> component, which we set up an event listener in the parent to respond to. Also note that in the template, we’re sending the selectedNote prop to the <NoteEditor> component, which needs that info as well.
Now let’s take a look at the template and script in the <NoteSelectors> component in app/components/NoteSelectors.vue, which is what is actually process the click event:
<template>
  <div class="note-selectors">
      <NoteSelector
        v-for="note in transformedNotes"
        v-bind:note="note"
        v-bind:selectedNote="selectedNote"
        v-bind:key="note.id"
        v-on:click.native="selectNote(note)"
      />
  </div>
</template>

<script>
import NoteSelector from './NoteSelector';

export default {
  name: 'note-selectors',
  props: ['notes', 'selectedNote'],
  methods: {
    selectNote: function(note) {
      this.$emit('selectNote', note);
    }
  },
  computed: {
    transformedNotes: function() {
      return this.notes.slice().sort(function(a, b) {
        return b.timestamp - a.timestamp;
      });
    }
  },
  components: {
    NoteSelector
  }
};
</script>
The key line in the template is:
v-on:click.native="selectNote(note)"This is binding the native DOM click event to a method called selectNote, which is defined in the component’s methods option:
methods: {
  selectNote: function(note) {
    this.$emit('selectNote', note);
  }
},
This starts the chain reaction — the user click’s on a <NoteSelector> component, triggering the parent <NoteSelectors> component’s selectNote method, which emits a 'selectNote' event, triggering the parent <NoteContainer> component’s selectNote method, which emits a 'selectNote' event, triggering the parent <App> component’s selectNote method, which changes the actual selectedNote data. Once the parent’s data changes, Vue.js automatically re-renders all the appropriate child components.
This style of programming (props down, events up, made popular by React) seems overly verbose at first, but it’s the key to keeping the architecture of the code clean. Without it, we would be running into jQuery spaghetti territory. The reason we can avoid complexity is because each component is forced to only know about what it needs to know — a child component doesn’t manipulate the parent’s data directly, it simply passes a message to the parent telling it some event occurred.
Two final things to look at —first, the <NoteSelector> component should use the selectedNote prop to properly style the component if the note prop is the same as the selectedNote prop. The template and script in src/components/NoteSelector.vue would look as follows:
<template>
  <div class="note-selector" v-bind:class="{active: note === selectedNote}">
    <p class="note-selector-title">
      {{ note.body | formatTitle }}
    </p>
    <p class="note-selector-timestamp">
      {{ note.timestamp | formatTimestamp }}
    </p>
  </div>
</template>

<script>
export default {
  name: 'note-selector',
  props: ['note', 'selectedNote'],
  filters: {
    formatTitle: function(body) {
      var maxLength = 20;
      if (body.length > maxLength) {
        return body.substring(0, maxLength - 3) + '...';
      } else if (body.length === 0) {
        return "New note";
      } else {
        return body;
      }
    },
    formatTimestamp: function(timestamp) {
      return new Date(timestamp).toUTCString();
    }
  }
};
</script>
Here we’re using the v-bind:class directive to conditionally apply the .active class on the div. The second thing is that the <NoteEditor> component should also receive the selectedNote prop and display it’s info accordingly. Here’s the template and script for src/components/NoteEditor.vue:
<template>
  <div class="note-editor">
    <p class="note-editor-info">
     {{ selectedNote.timestamp | formatTimestamp }}
    </p>
    <textarea class="note-editor-input"
      v-bind:value="selectedNote.body"
    >
    </textarea>
  </div>
</template>

<script>
export default {
  name: 'note-editor',
  props: ['selectedNote']
};
</script>
Here we’re registering 'selectedNote' as a prop and binding selectedNote.body to the <textarea>. We also need to format the selectedNote.timestamp— this is a bit of a problem, since we specifically defined formatTimestamp as a filter in the <NoteSelector> component. Now we’ll need to define the method in a more general place for multiple components to be able to use it. This can be done by registering the filter in src/main.js, right before we define the new Vue instance, as follows:
import Vue from "vue";
import App from "./App.vue";

Vue.config.productionTip = false;

Vue.filter("formatTimestamp", function (timestamp) {
  return new Date(timestamp).toUTCString();
});

new Vue({
  render: (h) => h(App),
}).$mount("#app");
That was a lot of code to make this particular feature work! You can see all the changes outlined above in this commit.
Edit the selected note on editor input #
Now we need to wire up the <NoteEditor> component to send events back up to the parent to edit the selectedNote’s body. Let’s look at it this time from the child going upwards, starting with the <NoteEditor> component in src/components/NoteEditor.vue:
<template>
  <div class="note-editor">
    <p class="note-editor-info">
      {{ selectedNote.timestamp | formatTimestamp }}
    </p>
    <textarea class="note-editor-input"
      v-bind:value="selectedNote.body"
      v-on:input="input($event)"
    >
    </textarea>
  </div>
</template>

<script>
export default {
  name: 'note-editor',
  props: ['selectedNote'],
  methods: {
    input: function($event) {
      this.$emit('inputNoteEditor', $event.target.value);
    }
  }
};
</script>
Here the code v-on:input="input($event)" is capturing the native DOM <textarea> input event and running the input method defined in the component’s methods option. The code this.$emit('inputNoteEditor', $event.target.value); will emit an 'inputNoteEditor' event to the parent component, passing along the text from the <textarea>’s native DOM event. This means the parent <NoteContainer> component must be wired up to listen for the 'inputNoteEditor' event, which would change the code in src/components/NoteContainer.vue as follows:
<template>
  <div class="note-container">
      <NoteSelectors
        v-bind:notes="notes"
        v-bind:selectedNote="selectedNote"
        v-on:selectNote="selectNote"
      />
      <NoteEditor
        v-bind:selectedNote="selectedNote"
        v-on:inputNoteEditor="inputNoteEditor"
      />
  </div>
</template>

<script>
import NoteSelectors from './NoteSelectors';
import NoteEditor from './NoteEditor';

export default {
  name: 'note-container',
  props: ['notes', 'selectedNote'],
  methods: {
    selectNote: function(note) {
      this.$emit('selectNote', note);
    },
    inputNoteEditor: function(body) {
      this.$emit('inputNoteEditor', body);
    }
  },
  components: {
    NoteSelectors,
    NoteEditor
  }
};
</script>
The code v-on:inputNoteEditor="inputNoteEditor" is listening for inputNoteEditor events from the child <NoteEditor> component, which will run the inputNoteEditor method defined in the methods option. The code this.$emit('inputNoteEditor', body); in the inputNoteEditor method will simply bubble the information further to the parent. Finally, the parent component will receive the data and update the selectedNote, which you can see in src/App.vue:
<template>
  <div id="app">
    <Toolbar/>
      <NoteContainer
        v-bind:notes="notes"
        v-bind:selectedNote="selectedNote"
        v-on:selectNote="selectNote"
        v-on:inputNoteEditor="updateSelectedNote"
      />
  </div>
</template>

<script>
import Toolbar from './components/Toolbar';
import NoteContainer from './components/NoteContainer';

export default {
  name: 'app',
  data: function() {
    var initialNotes = [
      {id: 1, body: "This is a first test", timestamp: Date.now()},
      {id: 2, body: "This is a second test", timestamp: Date.now()},
      {id: 3, body: "This is a third test", timestamp: Date.now()}
    ];
    return {
      notes: initialNotes,
      selectedNote: initialNotes[0]
    };
  },
  methods: {
    selectNote: function(note) {
      this.selectedNote = note;
    },
    updateSelectedNote: function(body) {
      this.selectedNote.body = body;
      this.selectedNote.timestamp = Date.now();
    }
  },
  components: {
    Toolbar,
    NoteContainer
  }
};
</script>
The code v-on:inputNoteEditor="updateSelectedNote" is listening for inputNoteEditor events from the <NoteContainer> component, and will run the updateSelectedNote method defined in the methods option accordingly. The updateSelectedNote method simply updates the selectedNote’s body and timestamp, which finally automatically trigger’s Vue.js to re-render all the child components.
Create a new note with a button #
Now let’s implement the ability to create a new note. Clicking on the “New” button should create a new note (new id, no body, current timestamp). The new note should become the currently selected note and appear at the top of the list of note selectors. Let’s start with the child <Toolbar> component in src/components/Toolbar.vue:
<template>
  <div class="toolbar">
    <button class="toolbar-button" v-on:click="clickNew">
      New
    </button>
    <button class="toolbar-button">Delete</button>
    <input class="toolbar-search" type="text" placeholder="Search...">
  </div>
</template>

<script>
export default {
  name: 'toolbar',
  methods: {
    clickNew: function() {
      this.$emit('clickNew');
    }
  }
};
</script>
Here the code v-on:click="clickNew" is capturing the native DOM <button> click event and running the clickNew method defined in the component’s methods option. The code this.$emit('clickNew'); will emit an 'clickNew' event to the parent component. This means the parent <App> component must be wired up to listen for the 'clickNew' event, which would change the code in src/App.vue as follows:
<template>
  <div id="app">
    <Toolbar v-on:clickNew="createNote"/>
      <NoteContainer
        v-bind:notes="notes"
        v-bind:selectedNote="selectedNote"
        v-on:selectNote="selectNote"
        v-on:inputNoteEditor="updateSelectedNote"
      />
  </div>
</template>

<script>
import Toolbar from './components/Toolbar';
import NoteContainer from './components/NoteContainer';

export default {
  name: 'app',
  data: function() {
    var initialNotes = [
      {id: 1, body: "This is a first test", timestamp: Date.now()},
      {id: 2, body: "This is a second test", timestamp: Date.now()},
      {id: 3, body: "This is a third test", timestamp: Date.now()}
    ];
    return {
      notes: initialNotes,
      selectedNote: initialNotes[0]
    };
  },
  methods: {
    selectNote: function(note) {
      this.selectedNote = note;
    },
    updateSelectedNote: function(body) {
      this.selectedNote.body = body;
      this.selectedNote.timestamp = Date.now();
    },
    createNote: function() {
      var newNote = {
        id: Date.now(),
        body: "",
        timestamp: Date.now()
      };
      this.notes.push(newNote);
      this.selectedNote = newNote;
    }
  },
  components: {
    Toolbar,
    NoteContainer
  }
};
</script>
The code v-on:clickNew="createNote" is listening for clickNew events from the <Toolbar> component, and will run the createNote method defined in the methods option accordingly. The createNote method pushes a new empty note into the notes data as well as updates the selectedNote data to the new note, which finally automatically trigger’s Vue.js to re-render all the child components.
Delete the selected note with a button #
Wiring up this feature starts off pretty similar to the new note feature. Let’s again start with the child <Toolbar> component in src/components/Toolbar.vue:
<template>
  <div class="toolbar">
    <button class="toolbar-button" v-on:click="clickNew">
      New
    </button>
    <button class="toolbar-button" v-on:click="clickDelete">
      Delete
    </button>
    <input class="toolbar-search" type="text" placeholder="Search...">
  </div>
</template>

<script>
export default {
  name: 'toolbar',
  methods: {
    clickNew: function() {
      this.$emit('clickNew');
    },
    clickDelete: function() {
      this.$emit('clickDelete');
    }
  }
};
</script>
Here the code v-on:click="clickDelete" is capturing the native DOM <button> click event and running the clickDelete method defined in the component’s methods option. The code this.$emit('clickDelete'); will emit an 'clickDelete' event to the parent component. This means the parent <App> component must be wired up to listen for the 'clickDelete' event, which would change the code in src/App.vue as follows:
<template>
  <div id="app">
      <Toolbar
        v-on:clickNew="createNote"
        v-on:clickDelete="deleteNote"
      />
      <NoteContainer
        v-bind:notes="notes"
        v-bind:selectedNote="selectedNote"
        v-on:selectNote="selectNote"
        v-on:inputNoteEditor="updateSelectedNote"
      />
  </div>
</template>

<script>
import Toolbar from './components/Toolbar';
import NoteContainer from './components/NoteContainer';

export default {
  name: 'app',
  data: function() {
    var initialNotes = [
      {id: 1, body: "This is a first test", timestamp: Date.now()},
      {id: 2, body: "This is a second test", timestamp: Date.now()},
      {id: 3, body: "This is a third test", timestamp: Date.now()}
    ];
    return {
      notes: initialNotes,
      selectedNote: initialNotes[0]
    };
  },
  methods: {
    selectNote: function(note) {
      this.selectedNote = note;
    },
    updateSelectedNote: function(body) {
      this.selectedNote.body = body;
      this.selectedNote.timestamp = Date.now();
    },
    createNote: function() {
      var newNote = {
        id: Date.now(),
        body: "",
        timestamp: Date.now()
      };
      this.notes.push(newNote);
      this.selectedNote = newNote;
    },
    deleteNote: function() {
      var index = this.notes.indexOf(this.selectedNote);
      if (index !== -1) {
        this.notes.splice(index, 1);
        if (this.notes.length > 0) {
          this.selectedNote = this.notes[0];
        } else {
          this.selectedNote = {};
        }
      }
    }
  },
  components: {
    Toolbar,
    NoteContainer
  }
};
</script>
The code v-on:clickDelete="deleteNote" is listening for clickDelete events from the <Toolbar> component, and will run the deleteNote method defined in the methods option accordingly. The deleteNote method deletes the selected note from the notes data, which finally automatically trigger’s Vue.js to re-render all the child components.
However, there’s a problem — the deleteNote method also needs to select a new note in place of the one that’s deleted. The problem is that selecting a new note means we need to know the top of the list of the transformed (sorted) notes, which we defined in the sub-child <NoteSelectors> component. That seemed like the right decision at the time, but now we’ll need to refactor that method to be in the parent component, then pass the transformed notes as a prop to the appropriate children. This would change the code in src/App.vue as follows:
<template>
  <div id="app">
      <Toolbar
        v-on:clickNew="createNote"
        v-on:clickDelete="deleteNote"
      />
      <NoteContainer
        v-bind:notes="notes"
        v-bind:transformedNotes="transformedNotes"
        v-bind:selectedNote="selectedNote"
        v-on:selectNote="selectNote"
        v-on:inputNoteEditor="updateSelectedNote"
      />
  </div>
</template>

<script>
import Toolbar from './components/Toolbar';
import NoteContainer from './components/NoteContainer';

export default {
  name: 'app',
  data: function() {
    var initialNotes = [
      {id: 1, body: "This is a first test", timestamp: Date.now()},
      {id: 2, body: "This is a second test", timestamp: Date.now()},
      {id: 3, body: "This is a third test", timestamp: Date.now()}
    ];
    return {
      notes: initialNotes,
      selectedNote: initialNotes[0]
    };
  },
  methods: {
    selectNote: function(note) {
      this.selectedNote = note;
    },
    updateSelectedNote: function(body) {
      this.selectedNote.body = body;
      this.selectedNote.timestamp = Date.now();
    },
    createNote: function() {
      var newNote = {
        id: Date.now(),
        body: "",
        timestamp: Date.now()
      };
      this.notes.push(newNote);
      this.selectedNote = newNote;
    },
    deleteNote: function() {
      var index = this.notes.indexOf(this.selectedNote);
      if (index !== -1) {
        this.notes.splice(index, 1);
        if (this.transformedNotes.length > 0) {
          this.selectedNote = this.transformedNotes[0];
        } else {
          this.selectedNote = {};
        }
      }
    }
  },
  computed: {
    transformedNotes: function() {
      return this.notes.slice().sort(function(a, b) {
        return b.timestamp - a.timestamp;
      });
    }
  },
  components: {
    Toolbar,
    NoteContainer
  }
};
</script>
The code in src/components/NoteContainer.vue would simply pass the transformedNotes props down as follows:
<template>
  <div class="note-container">
      <NoteSelectors
        v-bind:notes="notes"
        v-bind:transformedNotes="transformedNotes"
        v-bind:selectedNote="selectedNote"
        v-on:selectNote="selectNote"
      />
      <NoteEditor
        v-bind:selectedNote="selectedNote"
        v-on:inputNoteEditor="inputNoteEditor"
      />
  </div>
</template>

<script>
import NoteSelectors from './NoteSelectors';
import NoteEditor from './NoteEditor';

export default {
  name: 'note-container',
  props: ['notes', 'transformedNotes', 'selectedNote'],
  methods: {
    selectNote: function(note) {
      this.$emit('selectNote', note);
    },
    inputNoteEditor: function(body) {
      this.$emit('inputNoteEditor', body);
    }
  },
  components: {
    NoteSelectors,
    NoteEditor
  }
};
</script>
And finally, the code in src/components/NoteSelectors.vue would no longer compute the transformedNotes but instead would use the transformedNotes props as follows:
<template>
  <div class="note-selectors">
      <NoteSelector
        v-for="note in transformedNotes"
        v-bind:note="note"
        v-bind:selectedNote="selectedNote"
        v-bind:key="note.id"
        v-on:click.native="selectNote(note)"
      />
  </div>
</template>

<script>
import NoteSelector from './NoteSelector';

export default {
  name: 'note-selectors',
  props: ['notes', 'transformedNotes', 'selectedNote'],
  methods: {
    selectNote: function(note) {
      this.$emit('selectNote', note);
    }
  },
  components: {
    NoteSelector
  }
};
</script>
The last detail is to change the <NoteEditor> component to only render if there is a selectedNote, since it’s now possible to delete all the notes. The template in src/components/NoteEditor.vue would change as follows:
<template>
  <div class="note-editor" v-if="selectedNote.id">
    <p class="note-editor-info">
      {{ selectedNote.timestamp | formatTimestamp }}
    </p>
      <textarea class="note-editor-input"
        v-bind:value="selectedNote.body"
        v-on:input="input($event)"
      >
    </textarea>
  </div>
</template>
Filter notes on search input #
The final feature is to be able to search notes immediately as you type in the search input. This means we’ll need to keep track of a new piece of data — the search text the user enters. This search text will be used to filter the list of notes, which means it must be defined in the <App> component, since that’s the component that stores the notes. The code in src/App.vue would change as follows:
<template>
  <div id="app">
      <Toolbar
        v-on:clickNew="createNote"
        v-on:clickDelete="deleteNote"
        v-bind:searchNoteText="searchNoteText"
        v-on:inputSearchNoteText="updateSearch"
      />
      <NoteContainer
        v-bind:notes="notes"
        v-bind:transformedNotes="transformedNotes"
        v-bind:selectedNote="selectedNote"
        v-on:selectNote="selectNote"
        v-on:inputNoteEditor="updateSelectedNote"
      />
  </div>
</template>

<script>
import Toolbar from './components/Toolbar';
import NoteContainer from './components/NoteContainer';

export default {
  name: 'app',
  data: function() {
    var initialNotes = [
      {id: 1, body: "This is a first test", timestamp: Date.now()},
      {id: 2, body: "This is a second test", timestamp: Date.now()},
      {id: 3, body: "This is a third test", timestamp: Date.now()}
    ];
    return {
      notes: initialNotes,
      selectedNote: initialNotes[0],
      searchNoteText: ""
    };
  },
  methods: {
    selectNote: function(note) {
      this.selectedNote = note;
    },
    updateSelectedNote: function(body) {
      this.selectedNote.body = body;
      this.selectedNote.timestamp = Date.now();
    },
    createNote: function() {
      var newNote = {
        id: Date.now(),
        body: "",
        timestamp: Date.now()
      };
      this.notes.push(newNote);
      this.selectedNote = newNote;
    },
    deleteNote: function() {
      var index = this.notes.indexOf(this.selectedNote);
      if (index !== -1) {
        this.notes.splice(index, 1);
        if (this.transformedNotes.length > 0) {
          this.selectedNote = this.transformedNotes[0];
        } else {
          this.selectedNote = {};
        }
      }
    },
    updateSearch: function(newSearchText) {
      this.searchNoteText = newSearchText;
      if (this.transformedNotes.length === 0) {
        this.selectedNote = {};
      } else if (this.transformedNotes.indexOf(this.selectedNote) === -1) {
        this.selectedNote = this.transformedNotes[0];
      }
    }
  },
  computed: {
    transformedNotes: function() {
      return this.notes
        .filter(function(note) {
          return note.body.toLowerCase().indexOf(this.searchNoteText.toLowerCase()) !== -1;
        }.bind(this))
        .sort(function(a, b) {
          return b.timestamp - a.timestamp;
        });
    }
  },
  components: {
    Toolbar,
    NoteContainer
  }
};
</script>
Let’s go through these changes one at a time.
- The code
v-bind:searchNoteText="searchNoteText"is sending thesearchNoteTextdata to the<Toolbar>component as a prop namedsearchNoteText. - The code
v-on:inputSearchNoteText="updateSearch"is listening forinputSearchNoteTextevents from the<Toolbar>component, and will run theupdateSearchmethod defined in the methods option accordingly. - The
updateSearchmethod updates thesearchNoteTextdata to the input argument, which automatically trigger’s Vue.js to re-render all the child components. It also has to update the selectedNote to be the top of thetransformedNotesif possible. - The
transformedNotescomputed property, which used to simply sort the notes, is now responsible for both filtering and sorting the notes. The notes are filtered based on whether or not the body contains thesearchNoteTextdata.
Finally, we need to wire the child <Toolbar> component in src/components/Toolbar.vue to respond to and fire off the right events:
<template>
  <div class="toolbar">
    <button class="toolbar-button" v-on:click="clickNew">
      New
    </button>
    <button class="toolbar-button" v-on:click="clickDelete">
      Delete
    </button>
      <input class="toolbar-search" type="text" placeholder="Search..."
        v-bind:value="searchNoteText"
        v-on:input="inputSearchNoteText($event)"
      />
  </div>
</template>

<script>
export default {
  name: 'toolbar',
  props: ['searchNoteText'],
  methods: {
    clickNew: function() {
      this.$emit('clickNew');
    },
    clickDelete: function() {
      this.$emit('clickDelete');
    },
    inputSearchNoteText: function($event) {
      this.$emit('inputSearchNoteText', $event.target.value);
    }
  }
};
</script>
As seen before, the <Toolbar> component contains no logic — it simply receives props and sends messages to the parent when the user interacts with it in various ways.
You can take a look at the final app in all its glory in this GitHub repository.
Conclusion #
As you can see, working with components is incredibly different than without, even when using the same Vue.js framework! This is truly what Vue.js means when it describes itself as a progressive framework — you don’t need to understand components to get started with it, which simplifies the on boarding learning curve. For larger scale apps, it can be worthwhile to learn this component architecture as a solid way to organize your code.
I would argue that for this particular notes app, a Vue.js component architecture may be overkill. However, this is a debatable point, since every app continues to grow in complexity as more features are added. Still, even though components are daunting at first, you start to get used to the repeating patterns and they become easy enough over time. Only when your app grows so large that it becomes nearly impossible to understand all the code at once will you appreciate the clean separations that a component architecture provides.
In the next part of this series, we’ll take a look at implementing the same notes app using React, a completely different framework with a similar component model. Stay tuned!