Comparing Frontend Approaches Part 5: React
- Part 1: Introduction
- Part 2: jQuery
- Part 3: Vue.js
- Part 4: Vue.js with components
- Part 5: React
- Part 6: Elm
- Part 7: Final thoughts
In this part we will be implementing the web based clone of the Mac Notes app using React. React is a JavaScript framework that was created around 2011 and open-sourced in 2013. It currently has won over developer mindshare in a big way and is the most popular framework in 2017 by various metrics (over 75,000 stars on GitHub).
React pioneered the virtual DOM approach (at least in JavaScript frameworks), where the HTML is completely generated through JavaScript instead of a template. It also was one of the first frontend frameworks to push for a completely component centered approach. Unlike Vue.js, which bills itself as a progressive framework (i.e., you don’t need to start with components, you can work your way up there), React is a bit more insistent (the very first step they recommend is to break the UI into components). Let’s see what it looks like in practice!
Note — this isn’t meant to be a tutorial for people completely new to React. In particular, React uses a lot of new JavaScript ES2015+ features, which I won’t be covering in full detail. You can check out this resource first if you’d like an overview of these new features before reading this post.
Installation #
Like Vue.js with components, getting started with React can be a bit tricky, since writing code with components involves bundling code in separate files, requiring a build step. Fortunately, like Vue.js, React offers an official command line tool to scaffold your projects, called Create React App. If you don’t already have it installed, you can install it with the command:
$ npm install -g create-react-app
Once you have it installed, you can navigate to the directory you want to create your project in and run:
$ create-react-app my-app
You should replace my-app with whatever name you want your particular project to have. This will take a little while to create files and folders and download the necessary packages from npm. In the end you will end up a new folder called my-app with the following project structure:
my-app
├── README.md
├── node_modules
├── package.json
├── .gitignore
├── public
│   └── favicon.ico
│   └── index.html
│   └── manifest.json
└── src
    └── App.css
    └── App.js
    └── App.test.js
    └── index.css
    └── index.js
    └── logo.svg
    └── registerServiceWorker.js
Again, even though there’s a lot of files, you don’t need to worry about most of them for right now — pretty much all of our work will be in the src directory. At this point you already have a hello world app built for you, which you can see by entering the following commands:
$ cd my-app$ npm start
The last command will run a dev server and automatically open up your browser to localhost:3000, where you should see something like this:
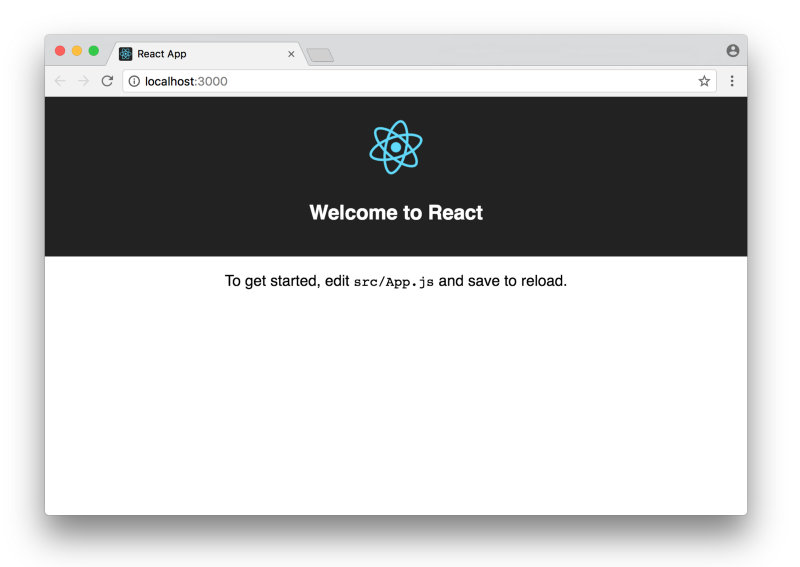
This is pretty cool, and what’s cooler is that you have a hot-reloading environment already set up for you. What that means is that if you make changes to your code, the browser at localhost:3000 will automatically refresh. As it says, the place to start making changes is src/App.js, which right now looks like this:
import React, { Component } from "react";
import logo from "./logo.svg";
import "./App.css";

class App extends Component {
  render() {
    return (
      <div className="App">
        <header className="App-header">
          <img src={logo} className="App-logo" alt="logo" />
          <h1 className="App-title">Welcome to React</h1>
        </header>
        <p className="App-intro">
          To get started, edit <code>src/App.js</code> and save to reload.
        </p>
      </div>
    );
  }
}

export default App;
This is a React component — it makes heavy use of both ES2015 JavaScript features (imports, destructuring, classes) as well as JSX. JSX is syntax which allows you to write what looks like HTML in the middle of your JavaScript (it’s not actually HTML, it gets converted into JavaScript statements during a build step). So your HTML template is defined in your JavaScript, there are no separate files for your HTML. In this example, the CSS is defined in the separate App.css file and is imported into the JavaScript as well. This means we can install our notes template by changing src/App.js as follows:
import React, { Component } from "react";
import "./App.css";

class App extends Component {
  render() {
    return (
      <div id="app">
        <div className="toolbar">
          <button className="toolbar-button">New</button>
          <button className="toolbar-button">Delete</button>
          <input className="toolbar-search" type="text" placeholder="Search..." />
        </div>
        <div className="note-container">
          <div className="note-selectors">
            <div className="note-selector active">
              <p className="note-selector-title">First note...</p>
              <p className="note-selector-timestamp">Timestamp here...</p>
            </div>
            <div className="note-selector">
              <p className="note-selector-title">Second note...</p>
              <p className="note-selector-timestamp">Timestamp here...</p>
            </div>
            <div className="note-selector">
              <p className="note-selector-title">Third note...</p>
              <p className="note-selector-timestamp">Timestamp here...</p>
            </div>
          </div>
          <div className="note-editor">
            <p className="note-editor-info">Timestamp here...</p>
            <textarea className="note-editor-input"></textarea>
          </div>
        </div>
      </div>
    );
  }
}

export default App;
Note that I had to convert the HTML to JSX, which is mostly the same but with minor differences to keep the syntax compatible with JavaScript. In this case, the HTML class attribute had to be renamed to className (since class is a reserved word in JavaScript). Once the JavaScript is set up, we can add the note template’s CSS in the App.css file as follows:
/* RESET */
* {
  margin: 0;
  padding: 0;
  border: 0;
  outline: none;
  box-sizing: border-box;
}

/* LAYOUT */
#app {
  display: flex;
  flex-direction: column;
  min-height: 100vh;
}
.toolbar {
  padding: 0.5em;
}
.toolbar-button,
.toolbar-search {
  padding: inherit;
  border-radius: 0.3em;
}
.toolbar-search {
  float: right;
}
.note-container {
  display: flex;
  flex: 1;
}
.note-selectors {
  flex: 0 0 13em;
}
.note-selector {
  padding: 1em;
}
.note-selector p {
  margin: 0;
}
.note-editor {
  display: flex;
  flex: 1;
  flex-direction: column;
}
.note-editor-info {
  padding: 0.5em;
  text-align: center;
}
.note-editor-input {
  display: flex;
  flex: 1;
  width: 100%;
  padding: 0 2em 0 2em;
}

/* COLORS */
* {
  color: #454545;
  background-color: #fafaf8;
}
.toolbar {
  background-color: #dcdadc;
}
.toolbar-button {
  background-color: #ffffff;
}
.toolbar-button:active {
  background-color: #aaaaaa;
}
.note-selectors {
  border-right: 1px solid #dcdadc;
}
.note-selector {
  border-bottom: 1px solid #dcdadc;
}
.note-selector.active {
  background-color: #fce18d;
}
.note-selector-title {
  background-color: inherit;
}
.note-selector-timestamp {
  color: #626262;
  background-color: inherit;
}
.note-editor-info {
  color: #dcdadc;
}

/* TYPOGRAPHY */
body {
  font-family: sans-serif;
}
.note-selector-title {
  font-weight: bold;
}
.note-selector-timestamp {
  font-size: 0.7em;
}
.note-editor,
.note-editor-input {
  font-size: 0.9em;
}
If you look at your browser, you should see our familiar notes app starting point!
Refactor into components #
The next step is to break this src/App.js file into components. Here is a diagram of the different components we can break this app into:
<App>
├── <Toolbar>
└── <NoteContainer>
    ├── <NoteSelectors>
    │   └── <NoteSelector>
    │   └── <NoteSelector>
    │   └── <NoteSelector>
    └── <NoteEditor>
You could of course break it down even further (with individual button components for the toolbar for example), but this is a good starting point. Using this structure, the src/App.js file would now look like:
import React, { Component } from "react";
import Toolbar from "./components/Toolbar";
import NoteContainer from "./components/NoteContainer";
import "./App.css";

class App extends Component {
  render() {
    return (
      <div id="app">
        <Toolbar />
        <NoteContainer />
      </div>
    );
  }
}

export default App;
The template essentially only contains the <Toolbar /> and <NoteContainer />custom component tags, which are imported above (note the self closing tags, which is the recommended style for components without any content). Let’s take a look at one of the sub-components, src/components/Toolbar.js:
import React, { Component } from "react";

class Toolbar extends Component {
  render() {
    return (
      <div className="toolbar">
        <button className="toolbar-button">New</button>
        <button className="toolbar-button">Delete</button>
        <input className="toolbar-search" type="text" placeholder="Search..." />
      </div>
    );
  }
}

export default Toolbar;
As you can see, it’s the same as before — you create a new class which extends the React Component class, and you write a render function which defines the JSX template.
So breaking things into components is a pretty straightforward task. The harder part comes when dealing with data and events. If you want to see what the rest of the components look like right now (they pretty much follow the same pattern), you can check them out in full detail here.
Display note titles from an array of notes #
Now that things are broken into components, we have to make some choices when it comes to storing and passing data. For the array of notes, it makes sense for the main <App> component to keep track of the notes and pass it down to its children. This would make the code in src/App.js look like:
import React, { Component } from "react";
import Toolbar from "./components/Toolbar";
import NoteContainer from "./components/NoteContainer";
import "./App.css";

class App extends Component {
  constructor(props) {
    super(props);
    this.state = {
      notes: [
        { id: 1, body: "This is a first test", timestamp: Date.now() },
        { id: 2, body: "This is a second test", timestamp: Date.now() },
        { id: 3, body: "This is a third test", timestamp: Date.now() },
      ],
    };
  }

  render() {
    return (
      <div id="app">
        <Toolbar />
        <NoteContainer notes={this.state.notes} />
      </div>
    );
  }
}

export default App;
Here we have to make a custom constructor function for the class, which first runs the Component constructor with super(props);, then defines the custom state for the instance (which is equivalent to Vue.js’ data option). Once the state is stored upon initialization, we can pass it to the <NoteContainer> component with the line:
<NoteContainer notes={this.state.notes} />In JSX, you can write any JavaScript you want in single curly brackets (as opposed to double curly brackets in Vue.js). Here we’re taking the notes initialized in the component’s state and binding it to the child <NoteContainer> component. The <NoteContainer> component doesn’t directly use the notes data — instead it passes it down to the next child component. The code in src/components/NoteContainer.js looks like:
import React, { Component } from "react";
import NoteSelectors from "./NoteSelectors";
import NoteEditor from "./NoteEditor";

class NoteContainer extends Component {
  render() {
    return (
      <div className="note-container">
        <NoteSelectors notes={this.props.notes} />
        <NoteEditor />
      </div>
    );
  }
}

export default NoteContainer;
Note the change in terminology — this time notes is referred to using props, not state. It’s worth going over in more detail here:
- The parent
<App>component contains the note data, stored in itsstate. It has the ability to make changes to its own state, as well as pass any part of it down to its child components. - Any data a child component receives from its parent component is stored in
props. In this case the child<NoteContainer>component receives thenotesdata in itsprops. A child component is not allowed to make changes to theprops, since the data belongs to the parent component.
This means in the child <NoteContainer> component, the line
<NoteSelectors notes={this.props.notes} />is taking the this.props.notes data it received from its parent and passing it to the child <NoteSelectors> component as new props with a key of notes.
Finally, we get to <NoteSelectors> component, which does actually use the notes. This is what the code in src/components/NoteSelectors.js looks like:
import React, { Component } from "react";
import NoteSelector from "./NoteSelector";

class NoteSelectors extends Component {
  render() {
    const noteSelectors = this.props.notes.map((note) => (
      <NoteSelector
        key={note.id}
        body={note.body}
        timestamp={note.timestamp}
      />
    ));

    return (
      <div className="note-selectors">
        {noteSelectors}
      </div>
    );
  }
}

export default NoteSelectors;
React doesn’t provide a special mechanism to loop through data — instead we’re using the built-in array map function to create an array of <NoteSelector> components, stored in the variable noteSelectors and rendered in the JSX. Finally, the <NoteSelector> component renders the data bound to its props, as you can see in src/components/NoteSelector.js:
import React, { Component } from "react";

class NoteSelector extends Component {
  render() {
    return (
      <div className="note-selector">
        <p className="note-selector-title">
          {this.props.body}
        </p>
        <p className="note-selector-timestamp">
          {this.props.timestamp}
        </p>
      </div>
    );
  }
}

export default NoteSelector;
For now, I’m using the note’s body and raw timestamp as placeholders, we’ll look at formatting them next.
Use functions to sort and format notes #
Unlike Vue.js, React doesn’t provide special mechanisms for things like computed properties and filters. Instead, you simply write functions as needed. This is what the src/components/NoteSelector.js code looks like with text formatting:
import React, { Component } from "react";

function formatTitle(body) {
  var maxLength = 20;
  if (body.length > maxLength) {
    return body.substring(0, maxLength - 3) + "...";
  } else if (body.length === 0) {
    return "New note";
  } else {
    return body;
  }
}

function formatTimestamp(timestamp) {
  return new Date(timestamp).toUTCString();
}

class NoteSelector extends Component {
  render() {
    return (
      <div className="note-selector">
        <p className="note-selector-title">
          {formatTitle(this.props.body)}
        </p>
        <p className="note-selector-timestamp">
          {formatTimestamp(this.props.timestamp)}
        </p>
      </div>
    );
  }
}

export default NoteSelector;
Similarly, this is what the src/components/NoteSelectors.js code looks like to sort the child <NoteSelector> components by timestamps:
import React, { Component } from "react";
import NoteSelector from "./NoteSelector";

class NoteSelectors extends Component {
  render() {
    const sortedNotes = this.props.notes.slice().sort((a, b) =>
      b.timestamp - a.timestamp
    );
    const noteSelectors = sortedNotes.map((note) => (
      <NoteSelector
        key={note.id}
        body={note.body}
        timestamp={note.timestamp}
      />
    ));

    return (
      <div className="note-selectors">
        {noteSelectors}
      </div>
    );
  }
}

export default NoteSelectors;
This is one of the promises of React as a framework — it tries to keep its API to a minimum, relying on vanilla JavaScript whenever possible to implement features.
Select a note on title click #
Now let’s implement the ability to actually select notes. Clicking on a note title should both highlight the selected note on the left as well as display the contents in the editor on the right. First we’ll change the template in src/App.js as follows:
import React, { Component } from "react";
import Toolbar from "./components/Toolbar";
import NoteContainer from "./components/NoteContainer";
import "./App.css";

class App extends Component {
  constructor(props) {
    super(props);
    this.state = {
      notes: [
        { id: 1, body: "This is a first test", timestamp: Date.now() },
        { id: 2, body: "This is a second test", timestamp: Date.now() },
        { id: 3, body: "This is a third test", timestamp: Date.now() },
      ],
      selectedNoteId: 1,
    };
  }

  handleClickNote = (id) => {
    this.setState({ selectedNoteId: id });
  };

  render() {
    return (
      <div id="app">
        <Toolbar />
        <NoteContainer
          notes={this.state.notes}
          selectedNoteId={this.state.selectedNoteId}
          onClickNote={this.handleClickNote}
        />
      </div>
    );
  }
}

export default App;
Let’s go over these changes one at a time:
- We are adding
selectedNoteIdto the state to keep track of which note was selected. This is different than Vue.js, where we kept track of the note itself instead of just the id. This works better with the way React handles changes to the state, which we’ll see next. - We are defining a new
handleClickNotefunction which takes an id and updates the state using React’ssetStatemethod. This is an important part of React — you must use thissetStatemethod to change any state, without it React won’t be able to properly update the DOM when state changes. (Note the weird way I’m defining thehandleClickNotemethod in the class — this syntax helps properly bind the rightthisto the method in an efficient way. You can read more about it and other approaches here). - We are binding a new prop to the child
<NoteContainer>component calledselectedNoteId, which is set to the current component’s state’sselectedNoteId. - We are binding another new prop to the child
<NoteContainer>component calledonClickNote, which is set to the current component’shandleClickNotemethod we defined earlier. This is also different from Vue.js — there is no special notion of event emitters and listeners in React, you simply pass functions as part of the regularpropswhich the child will call when appropriate.
Note the naming convention here — the actual event handler is named handleClickNote, the event handler as passed through in props is named onClickNote. This makes it easier to keep track of where event handlers are coming from, which we can see more clearly as we follow the props into the child components. The code in src/components/NoteContainer.js looks like:
import React, { Component } from "react";
import NoteSelectors from "./NoteSelectors";
import NoteEditor from "./NoteEditor";

class NoteContainer extends Component {
  render() {
    return (
      <div className="note-container">
        <NoteSelectors
          notes={this.props.notes}
          selectedNoteId={this.props.selectedNoteId}
          onClickNote={this.props.onClickNote}
        />
        <NoteEditor />
      </div>
    );
  }
}

export default NoteContainer;
Right now this component is only passing the props further into the <NoteSelectors> component. The code in src/components/NoteSelectors.js looks like:
import React, { Component } from "react";
import NoteSelector from "./NoteSelector";

class NoteSelectors extends Component {
  render() {
    const sortedNotes = this.props.notes.slice().sort((a, b) => b.timestamp - a.timestamp);
    const noteSelectors = sortedNotes.map((note) => (
      <NoteSelector
        key={note.id}
        body={note.body}
        timestamp={note.timestamp}
        id={note.id}
        selectedNoteId={this.props.selectedNoteId}
        onClickNote={this.props.onClickNote}
      />
    ));

    return <div className="note-selectors">{noteSelectors}</div>;
  }
}

export default NoteSelectors;
Again, this component is only passing the props further into the <NoteSelector> component. Note that it’s also adding one more prop for the note id, which will be useful in a moment. Finally, we’ll see how the props get used in src/components/NoteSelector.js:
import React, { Component } from "react";

function formatTitle(body) {
  var maxLength = 20;
  if (body.length > maxLength) {
    return body.substring(0, maxLength - 3) + "...";
  } else if (body.length === 0) {
    return "New note";
  } else {
    return body;
  }
}

function formatTimestamp(timestamp) {
  return new Date(timestamp).toUTCString();
}

class NoteSelector extends Component {
  handleClickNote = () => {
    this.props.onClickNote(this.props.id);
  };

  render() {
    return (
      <div
        className={"note-selector " + (this.props.id === this.props.selectedNoteId ? "active" : "")}
        onClick={this.handleClickNote}
      >
        <p className="note-selector-title">
          {formatTitle(this.props.body)}
        </p>
        <p className="note-selector-timestamp">
          {formatTimestamp(this.props.timestamp)}
        </p>
      </div>
    );
  }
}

export default NoteSelector;
There are three essential things happening here:
- The code
onClick={this.handleClickNote}is capturing the DOM’s click handler and binding it to the current component’shandleClickNotemethod. - The
handleClickNotemethod is defined to simply call the functiononClickNotethat was passed in from theprops. Recall that this was defined in the<App>component to update the state of theselectedNoteId. Once the state is updated, React will automatically re-render all the children components. - The code
className={"note-selector " + (this.props.id === this.props.selectedNoteId ? 'active' : '')}is using a JavaScript ternary operator to conditionally add the.activeclass to the div if the note is the selected note. Again, there isn’t any special syntax like Vue.js’v-bindto apply this class name, you’re just using built in JavaScript tools.
This is React’s way of managing components (props down, events up), which helps keep the architecture of the code clean and avoids jQuery spaghetti that we saw a bit of earlier. It’s a bit different than Vue.js’ component model — in Vue.js, each component can only pass emit and listen to events from its direct child and direct parent. In React, you don’t emit events, instead you pass functions (which can belong to any component) in props, which means the function can be called by a child, grandchild, etc. In this case the <NoteSelector> component is essentially the great-great-grandchild of the <App> component, but it is able to call the onClickNote prop which is directly connected to the <App> component. In Vue.js you would have to bubble up the event one component at a time.
Edit the selected note on editor input #
At this point we can select a note and it highlights accordingly, but the content of the selected note aren’t showing up in the <NoteEditor> component. We also need to be able to update the selected note as the user enters text in the editor. Here’s how the code would change in src/App.js:
import React, { Component } from 'react';
import Toolbar from './components/Toolbar'
import NoteContainer from './components/NoteContainer'
import './App.css';

class App extends Component {
  constructor(props) {
    super(props);
    this.state = {
      notes: [
        {id: 1, body: "This is a first test", timestamp: Date.now()},
        {id: 2, body: "This is a second test", timestamp: Date.now()},
        {id: 3, body: "This is a third test", timestamp: Date.now()}
      ],
      selectedNoteId: 1
    }
  }

  handleClickNote = (id) => {
    this.setState({selectedNoteId: id});
  }

  handleNoteEditorChange = (text) => {
    const newNotes = this.state.notes.map((note) => {
      if (note.id === this.state.selectedNoteId) {
        return {
          id: note.id,
          body: text,
          timestamp: Date.now()
        };
      } else {
        return note;
      }
    });
    this.setState({notes: newNotes});
  }

  render() {
    return (
      <div id="app">
        <Toolbar />
        <NoteContainer
          notes={this.state.notes}
          selectedNoteId={this.state.selectedNoteId}
          onClickNote={this.handleClickNote}
          onNoteEditorChange={this.handleNoteEditorChange}
        />
      </div>
    );
  }
}

export default App;
The handleNoteEditorChange is a method that updates the selected note’s body with the given text. The thing that makes it tricky is that React requires you to not directly mutate the state object; instead, you should create a new copy of the part of the state that’s changing and update it using the setState function. Here we’re using the built-in array map function to create a new copy of the notes, where each note remains unchanged except for the current selected note, which gets recreated with the new body and timestamp.
In the render function, we’re passing the handleNoteEditorChange method the <NoteContainer> component as a prop named onNoteEditorChange. To use the method, the code in src/components/NoteContainer.js would change as follows:
import React, { Component } from 'react';
import NoteSelectors from './NoteSelectors';
import NoteEditor from './NoteEditor';

class NoteContainer extends Component {
  render() {
    const selectedNote = this.props.notes.find(note =>
      note.id === this.props.selectedNoteId
    );

    return (
      <div className="note-container">
        <NoteSelectors
          notes={this.props.notes}
          selectedNoteId={this.props.selectedNoteId}
          onClickNote={this.props.onClickNote}
        />
        <NoteEditor
          selectedNote={selectedNote}
          onNoteEditorChange={this.props.onNoteEditorChange}
        />
      </div>
    );
  }
}

export default NoteContainer;
First we’re creating a variable called selectedNote, which we have to find from the given notes and selectedNoteId in props. Then we can bind the selectedNote to the <NoteEditor> props, along with the given onNoteEditorChange function. (Note that we have to find the selectedNote here as opposed to inside the <NoteEditor> component, because this component has access to both the notes and the selectedNoteId, whereas the <NoteEditor> doesn’t have access to the notes data).
Finally, we can see how the <NoteEditor> component will use the props in src/components/NoteEditor.js:
import React, { Component } from 'react';

function formatTimestamp(timestamp) {
  return new Date(timestamp).toUTCString();
}

class NoteEditor extends Component {
  handleChange = (event) => {
    this.props.onNoteEditorChange(event.target.value);
  }

  render() {
    return (
      <div className="note-editor">
        <p className="note-editor-info">
          {formatTimestamp(this.props.selectedNote.timestamp)}
        </p>
        <textarea className="note-editor-input"
          value={this.props.selectedNote.body}
          onChange={this.handleChange}
        />
      </div>
    );
  }
}

export default NoteEditor;
Let’s go over what’s going on here one at a time:
- We need to define a
formatTimestampfunction to format the editor’s timestamp. It’s the same as the function defined in the<NoteSelector>component, so we’ll need to find a way to DRY it up (in the next section). - The
handleChangemethod is going to be triggered from a DOM input event, and it will simply call up theonNoteEditorChangemethod that was given in theprops(first extracting out the user’s text from the event). - The
rendermethod displays theselectedNote’stimestamp and body, as well as bind’s the DOM’s<textarea>input event to run thehandleChangemethod defined above.
Again, the flow would be the user enters text in the <NoteEditor> component, which triggers its handleChange method, which runs the onNoteEditorChange method from its props, which all the way in the <App> component updates the notes in its state object, causing all the children to be re-rendered.
Refactor helper functions to separate file #
Right now we have an issue where we defined the same formatTimestamp function in two different components. Again, React doesn’t provide a React-specific way to handle this issue — you can use regular JavaScript to DRY up the code. In this case we’re going to write the helpers in a separate file, then import them as needed (which is not traditional JavaScript per se, but we’ve been using imports repeatedly throughout the code, so it shouldn’t be that hard). Here’s the new helper file in src/helpers.js:
export function formatTitle(body) {
  var maxLength = 20;
  if (body.length > maxLength) {
    return body.substring(0, maxLength - 3) + "...";
  } else if (body.length === 0) {
    return "New note";
  } else {
    return body;
  }
}

export function formatTimestamp(timestamp) {
  return new Date(timestamp).toUTCString();
}
And here’s how you would import the functions in src/components/NoteSelector.js:
import React, { Component } from 'react';
import {formatTitle, formatTimestamp} from '../helpers';

class NoteSelector extends Component {
  handleClickNote = () => {
    this.props.onClickNote(this.props.id);
  }

  render() {
    return (
      <div
        className={"note-selector " + (this.props.id === this.props.selectedNoteId ? 'active' : '')}
        onClick={this.handleClickNote}
      >
        <p className="note-selector-title">
          {formatTitle(this.props.body)}
        </p>
        <p className="note-selector-timestamp">
          {formatTimestamp(this.props.timestamp)}
        </p>
      </div>
    );
  }
}

export default NoteSelector;
You would do the same in src/components/NoteEditor.js to import the formatTimestamp function. This is an easy enough structure to put any helper functions in an organized spot going forward!
Create a new note with a button #
Now let’s implement the ability to create a new note. Clicking on the “New” button should create a new note (new id, no body, current timestamp). The new note should become the currently selected note and appear at the top of the list of note selectors. Let’s start with the child <Toolbar> component in src/components/Toolbar.js:
import React, { Component } from "react";

class Toolbar extends Component {
  render() {
    return (
      <div className="toolbar">
        <button className="toolbar-button" onClick={this.props.onNewNote}>
          New
        </button>
        <button className="toolbar-button">
          Delete
        </button>
        <input className="toolbar-search" type="text" placeholder="Search..." />
      </div>
    );
  }
}

export default Toolbar;
Here the code onClick={this.props.onNewNote} is capturing the native DOM <button> click event with onClick, which will run the onNewNote method from the props when the event fires. This means the parent <App> component must send down the onNewNote method in props appropriately, which would change the code in src/App.js as follows:
import React, { Component } from "react";
import Toolbar from "./components/Toolbar";
import NoteContainer from "./components/NoteContainer";
import "./App.css";

class App extends Component {
  constructor(props) {
    super(props);
    this.state = {
      notes: [
        { id: 1, body: "This is a first test", timestamp: Date.now() },
        { id: 2, body: "This is a second test", timestamp: Date.now() },
        { id: 3, body: "This is a third test", timestamp: Date.now() },
      ],
      selectedNoteId: 1,
    };
  }

  handleClickNote = (id) => {
    this.setState({ selectedNoteId: id });
  };

  handleNoteEditorChange = (text) => {
    const newNotes = this.state.notes.map((note) => {
      if (note.id === this.state.selectedNoteId) {
        return {
          id: note.id,
          body: text,
          timestamp: Date.now(),
        };
      } else {
        return note;
      }
    });
    this.setState({ notes: newNotes });
  };

  handleNewNote = () => {
    const newNote = {
      id: Date.now(),
      body: "",
      timestamp: Date.now(),
    };
    this.setState({
      notes: this.state.notes.concat([newNote]),
      selectedNoteId: newNote.id,
    });
  };

  render() {
    return (
      <div id="app">
        <Toolbar
          onNewNote={this.handleNewNote}
        />
        <NoteContainer
          notes={this.state.notes}
          selectedNoteId={this.state.selectedNoteId}
          onClickNote={this.handleClickNote}
          onNoteEditorChange={this.handleNoteEditorChange}
        />
      </div>
    );
  }
}

export default App;
Here the <Toolbar> component is sending the handleNewNote method as a prop called onNewNote (which we defined earlier to run whenever the “New” button in the toolbar is clicked). The handleNewNote method has to update the state with a new note as well as a new selected note id, which again requires care to avoid direct mutation. Here we’re creating a new copy of the notes array by using the array concat method. Once the state is updated with setState, React will automatically re-render the child components as needed.
Delete the selected note with a button #
Wiring up this feature starts off pretty similar to the new note feature. Let’s again start with the child <Toolbar> component in src/components/Toolbar.js:
import React, { Component } from "react";

class Toolbar extends Component {
  render() {
    return (
      <div className="toolbar">
        <button className="toolbar-button" onClick={this.props.onNewNote}>
          New
        </button>
        <button className="toolbar-button" onClick={this.props.onDeleteNote}>
          Delete
        </button>
        <input className="toolbar-search" type="text" placeholder="Search..." />
      </div>
    );
  }
}

export default Toolbar;
Here the code onClick={this.props.onDeleteNote} is capturing the native DOM <button> click event and running the onDeleteNote method from the props. This means the parent <App> component must send down the props appropriately, which would change the code in src/App.js as follows:
import React, { Component } from "react";
import Toolbar from "./components/Toolbar";
import NoteContainer from "./components/NoteContainer";
import { transformNotes } from "./helpers";
import "./App.css";

class App extends Component {
  constructor(props) {
    super(props);
    this.state = {
      notes: [
        { id: 1, body: "This is a first test", timestamp: Date.now() },
        { id: 2, body: "This is a second test", timestamp: Date.now() },
        { id: 3, body: "This is a third test", timestamp: Date.now() },
      ],
      selectedNoteId: 1,
    };
  }

  handleClickNote = (id) => {
    this.setState({ selectedNoteId: id });
  };

  handleNoteEditorChange = (text) => {
    const newNotes = this.state.notes.map((note) => {
      if (note.id === this.state.selectedNoteId) {
        return {
          id: note.id,
          body: text,
          timestamp: Date.now(),
        };
      } else {
        return note;
      }
    });
    this.setState({ notes: newNotes });
  };

  handleNewNote = () => {
    const newNote = {
      id: Date.now(),
      body: "",
      timestamp: Date.now(),
    };
    this.setState({
      notes: this.state.notes.concat([newNote]),
      selectedNoteId: newNote.id,
    });
  };

  handleDeleteNote = () => {
    const newNotes = this.state.notes.filter((note) => note.id !== this.state.selectedNoteId);
    const transformedNotes = transformNotes(newNotes);
    const newSelectedNoteId = transformedNotes.length > 0 ? transformedNotes[0].id : null;
    this.setState({
      notes: newNotes,
      selectedNoteId: newSelectedNoteId,
    });
  };

  render() {
    return (
      <div id="app">
        <Toolbar
          onNewNote={this.handleNewNote}
          onDeleteNote={this.handleDeleteNote}
        />
        <NoteContainer
          notes={this.state.notes}
          selectedNoteId={this.state.selectedNoteId}
          onClickNote={this.handleClickNote}
          onNoteEditorChange={this.handleNoteEditorChange}
        />
      </div>
    );
  }
}

export default App;
Here the <Toolbar> component is sending the handleDeleteNote method as a prop called onDeleteNote, which we defined earlier to run whenever the “Delete” button in the toolbar is clicked. The handleDeleteNote method has to update the state with a deleted note as well as a new selected note id, which again requires care to avoid mutation. Here we’re creating a new copy of the notes array by using the array filter method. Once the state is updated with setState, React will automatically re-render the child components as needed.
However, there’s a problem — the handleDeleteNote method also needs to select a new note in place of the one that’s deleted. The problem is that selecting a new note means we need to know the top of the list of the transformed (sorted) notes, which we defined in the child <NoteSelectors>component. That seemed like the right decision at the time, but now we’ll need to refactor that method to be in the src/helpers.js file as follows:
export function formatTitle(body) {
  var maxLength = 20;
  if (body.length > maxLength) {
    return body.substring(0, maxLength - 3) + "...";
  } else if (body.length === 0) {
    return "New note";
  } else {
    return body;
  }
}

export function formatTimestamp(timestamp) {
  return new Date(timestamp).toUTCString();
}

export function transformNotes(notes) {
  return notes.slice().sort((a, b) =>
    b.timestamp - a.timestamp
  );
}
The <NoteSelectors> component in src/components/NoteSelectors.js can now import the transformNotes helper function as well:
import React, { Component } from "react";
import NoteSelector from "./NoteSelector";
import { transformNotes } from "../helpers";

class NoteSelectors extends Component {
  render() {
    const noteSelectors = transformNotes(this.props.notes).map((note) => (
      <NoteSelector
        key={note.id}
        body={note.body}
        timestamp={note.timestamp}
        id={note.id}
        selectedNoteId={this.props.selectedNoteId}
        onClickNote={this.props.onClickNote}
      />
    ));

    return <div className="note-selectors">{noteSelectors}</div>;
  }
}

export default NoteSelectors;
The last detail is to change the <NoteEditor> component to only render if there is a selectedNote, since it’s now possible to delete all the notes. The template in src/components/NoteEditor.js would change as follows:
import React, { Component } from 'react';
import {formatTimestamp} from '../helpers';

class NoteEditor extends Component {
  handleChange = (event) => {
    this.props.onNoteEditorChange(event.target.value);
  }

  render() {
    if (this.props.selectedNote) {
      return (
        <div className="note-editor">
          <p className="note-editor-info">
            {formatTimestamp(this.props.selectedNote.timestamp)}
          </p>
          <textarea className="note-editor-input"
            value={this.props.selectedNote.body}
            onChange={this.handleChange}
          />
        </div>
      );
    } else {
      return null;
    }
  }
}

export default NoteEditor;
Again, no special React syntax, just a regular JavaScript if condition on the render method (returning null to skip rendering the component).
Filter notes on search input #
The final feature is to be able to search notes immediately as you type in the search input. Let’s again start with the child <Toolbar> component in src/components/Toolbar.js:
import React, { Component } from 'react';

class Toolbar extends Component {
  handleInput = (event) => {
    this.props.onSearchNote(event.target.value);
  }

  render() {
    return (
      <div className="toolbar">
        <button className="toolbar-button" onClick={this.props.onNewNote}>
          New
        </button>
        <button className="toolbar-button" onClick={this.props.onDeleteNote}>
          Delete
        </button>
        <input className="toolbar-search" type="text" placeholder="Search..."
          onInput={this.handleInput}
        />
      </div>
    );
  }
}

export default Toolbar;
Here the code onInput={this.handleInput} is capturing the native DOM <input> input event and running the handleInput method. The handleInput method simply calls up the onSearchNote method from the props, giving it the value of the user’s text. This means the parent <App> component must send down the props appropriately, which would change the code in src/App.js as follows:
import React, { Component } from 'react';
import Toolbar from './components/Toolbar';
import NoteContainer from './components/NoteContainer';
import {transformNotes} from './helpers';
import './App.css';

class App extends Component {
  constructor(props) {
    super(props);
    this.state = {
      notes: [
        {id: 1, body: "This is a first test", timestamp: Date.now()},
        {id: 2, body: "This is a second test", timestamp: Date.now()},
        {id: 3, body: "This is a third test", timestamp: Date.now()}
      ],
      selectedNoteId: 1,
      searchText: ""
    }
  }

  handleClickNote = (id) => {
    this.setState({selectedNoteId: id});
  }

  handleNoteEditorChange = (text) => {
    const newNotes = this.state.notes.map((note) => {
      if (note.id === this.state.selectedNoteId) {
        return {
          id: note.id,
          body: text,
          timestamp: Date.now()
        };
      } else {
        return note;
      }
    });
    this.setState({notes: newNotes});
  }

  handleNewNote = () => {
    const newNote = {
      id: Date.now(),
      body: "",
      timestamp: Date.now()
    }
    this.setState({
      notes: this.state.notes.concat([newNote]),
      selectedNoteId: newNote.id
    })
  }

  handleDeleteNote = () => {
    const newNotes = this.state.notes.filter(note =>
      note.id !== this.state.selectedNoteId
    );
    const transformedNotes = transformNotes(newNotes, this.state.searchText);
    const newSelectedNoteId = transformedNotes.length > 0 ? transformedNotes[0].id : null
    this.setState({
      notes: newNotes,
      selectedNoteId: newSelectedNoteId
    });
  }

  handleSearchNote = (newSearchText) => {
    const transformedNotes = transformNotes(this.state.notes, newSearchText);
    let newSelectedNoteId = null;
    if (transformedNotes.length > 0) {
      const selectedNote = transformedNotes.find(note => note.id === this.state.selectedNoteId);
      if (selectedNote) {
        newSelectedNoteId = selectedNote.id;
      } else {
        newSelectedNoteId = transformedNotes[0].id;
      }
    }
    this.setState({
      searchText: newSearchText,
      selectedNoteId: newSelectedNoteId
    })
  }

  render() {
    return (
      <div id="app">
        <Toolbar
          onNewNote={this.handleNewNote}
          onDeleteNote={this.handleDeleteNote}
          onSearchNote={this.handleSearchNote}
        />
        <NoteContainer
          notes={this.state.notes}
          selectedNoteId={this.state.selectedNoteId}
          searchText={this.state.searchText}
          onClickNote={this.handleClickNote}
          onNoteEditorChange={this.handleNoteEditorChange}
        />
      </div>
    );
  }
}

export default App;
Let’s go through these changes one at a time:
- We are keeping track of a new piece of state,
searchText— the search text the user enters. This will be used to filter the list of notes. - The
transformNoteshelper method now takes in two arguments — the array ofnotesas well as thesearchText. The transformation will now consist of both filtering and sorting (see below). - The
handleSearchNotemethod updates thesearchTextdata to the input argument, which automatically triggers React to re-render all the child components. It also has to update theselectedNoteIdto be the first of thetransformedNotesif possible. - The
<Toolbar>component now takes in a new proponSearchNote={this.handleSearchNote}so it can call up thehandleSearchNotefunction whenever the search input text changes. - The
<NoteContainer>component now takes in a new propsearchText={this.state.searchText}, which the children components will need to properly filter the notes as well.
The transformNotes helper function in src/helpers.js now looks like:
export function formatTitle(body) {
  var maxLength = 20;
  if (body.length > maxLength) {
    return body.substring(0, maxLength - 3) + "...";
  } else if (body.length === 0) {
    return "New note";
  } else {
    return body;
  }
}

export function formatTimestamp(timestamp) {
  return new Date(timestamp).toUTCString();
}

export function transformNotes(notes, searchText) {
  return notes
    .filter((note) => note.body.toLowerCase().indexOf(searchText.toLowerCase()) !== -1)
    .sort((a, b) => b.timestamp - a.timestamp);
}
The <NoteContainer> component changes slightly to continue to pass along the searchText prop, which you can see in src/components/NoteContainer.js:
import React, { Component } from 'react';
import NoteSelectors from './NoteSelectors';
import NoteEditor from './NoteEditor';

class NoteContainer extends Component {
  render() {
    const selectedNote = this.props.notes.find(note => note.id === this.props.selectedNoteId);

    return (
      <div className="note-container">
        <NoteSelectors
          notes={this.props.notes}
          selectedNoteId={this.props.selectedNoteId}
          searchText={this.props.searchText}
          onClickNote={this.props.onClickNote}
        />
        <NoteEditor
          selectedNote={selectedNote}
          onNoteEditorChange={this.props.onNoteEditorChange}
        />
      </div>
    );
  }
}

export default NoteContainer;
Finally, the <NoteSelectors> component uses the searchText prop to filter the notes using the transformNotes helper function, which you can see in src/components/NoteSelectors.js:
import React, { Component } from 'react';
import NoteSelector from './NoteSelector';
import {transformNotes} from '../helpers';

class NoteSelectors extends Component {
  render() {
    const transformedNotes = transformNotes(this.props.notes, this.props.searchText);
    const noteSelectors = transformedNotes.map(note =>
      <NoteSelector
        key={note.id}
        body={note.body}
        timestamp={note.timestamp}
        id={note.id}
        selectedNoteId={this.props.selectedNoteId}
        onClickNote={this.props.onClickNote}
      />
    );

    return (
      <div className="note-selectors">
        {noteSelectors}
      </div>
    );
  }
}

export default NoteSelectors;
You can see the final version of the code in all its glory at this GitHub repository.
Conclusion #
In many ways, working with React components is quite similar to working with Vue.js components (Vue.js was definitely heavily inspired by both Angular 1 and React). There’s definitely something nice about React providing a small API surface, without a lot of specialized approaches — it forces you to get better at your raw JavaScript skills. You need a loop to generate HTML from a list? Use the JavaScript array map method. You need conditional rendering? Use a regular JavaScript if condition. You want helper functions? Make functions in a file and import them. Pretty cool stuff.
However, at the same time React leans so heavily on new JavaScript features that it can definitely feel daunting to learn up front. And despite not having to learn React-specific syntax, you do need to accustom yourself to quite a bit of React specific idioms (naming event handlers, properly binding this without triggering extra re-rendering, avoiding mutation, etc.). Also, React can sometimes be unopinionated to the point where it creates confusion — there’s many different ways to define a component (the class keyword, pure functions, etc.), and quite a bit of debate on what’s the “best” way to do it.
React at the time of this writing is a pretty interesting blend of (what at least looks like) object oriented approaches and functional approaches. It’s definitely interesting to contrast with Vue.js, which encourages mutation of data as a key way of providing reactivity. React prefers an immutable approach to state, which can be at times tricky to achieve with JavaScript as a language. In the next part of this series, we’ll be looking at Elm, which is an actual pure functional language with immutable data structures that compiles to JavaScript. Stay tuned!